I'm always on the lookout for new and helpful ways for me to practise my craft. Recently a close relative had a crazy idea about making a replica amphora as a decorative object and was looking for a little workshop space; and tools; and help, to make it.
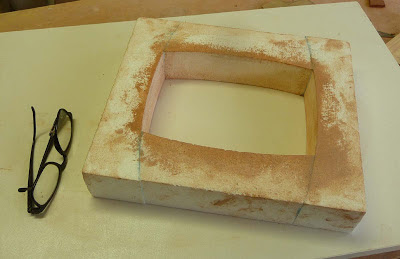
He'd chosen polystyrene as the material of construction. It was a snap to make. From 100mm deep sheets we simply cut discs with predefined cut inclinations, to get close to the final overall profile. My little bandsaw cut it nice and cleanly and after gluing up the discs it was easily sanded to a pretty smooth surface. The cut surface accepts the normal range of water based fillers and acrylic paint. It will dissolve almost at the sight of any solvent based material.
So with a few scraps lying about what could I do but slap some clay on it and see how they behaved together; which wsa prett positive actually. The poly does take on board a little water but has nothing like the pulling power of plaser of paris, so if using it as a mould it is a matter of relying on air drying to firm it up and get that first releasing shrinkage.
Scraps lead on as they do to a separate order from the poly man. The material is cut with a hot wire and can be supplied in any size and thickness you might like to order. It is interesting to do a little search just to see how versatile the material is and how it is used and shaped for all sorts of applications.
As far as potterty use goes it's like any other mould material; the choices are basically press moulding (concave mould) or slump moulding (convex mould).
I've tried both. Here's a slump mould for a shohin pot - now second hand as you can see. Once you have a picture of what the inside of the pot will be like then you can follow any number of options for the shape and profile of the outside wall. With the slump mould you can apply sufficient pressure to the outside to get good shaping and surface uniformity. I didn't try to 'fill' the surface with spak filler but that's possible to get a smoother inner surface.
And then this is a press mould. The polystyrene when cut on the bandsaw and hand sanded lightly leaves a nice roughish surface. With the press mould you can work on the inside of the pot to get it right without worrying about distorting the pot. Getting the pot out of the mould isn't as easy as plaster but after a couple of days with a little drying out they pop.
Here's a pot out of the above press mould. Any little remnants of polystyrene on the clay will either fall off as it dries or get burnt off in the bisque firing.
Like all making processes, scaleup challenges abound and twice as big is much more than twice as hard. The next shot is of a scaled up poly mould. The real benefit of using this stuff is the weight. Turning a plaster mould this size is almost a trial of engineering where as with the polystyrene the weight of the clay is as good as all there is.
Why do this rather than handbuilding? Good question. I think if there is the prospect of making more than one to a certain size then the investment may be worth it. A mould also lets you work with wetter clay which I think gives you a better dimensional result. Handbuilding a pot which has more than just a little wall inclination and maintaining symmetry is not easy without crafted props anyway, and that is what the poly does. There are lots of choices to make in how to use this material to assist the process and I'll keep working at it for a while to see if I can crack it.
I've been working on some commissioned pots recently, a number of them quite large. The first batch are in the kiln for bisque firing today. There'll be a seies of new finished pots to see soon.


Thanks for sharing, me being a new potter no one wabts to share anything with me. I have to go on youtube to learn techniques. Can you tell me a little bit about the feet like when are they aplied how dry and firm is the clay and what type of clay are u using
ReplyDeleteOk Reggie, how about I do a post on this - soon
ReplyDelete